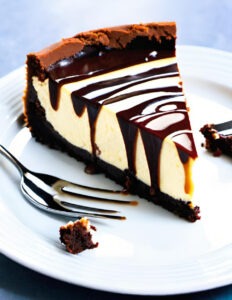
Citrus Berry Cheesecake Layer Cake: The Ultimate Crowd-Pleasing Dessert
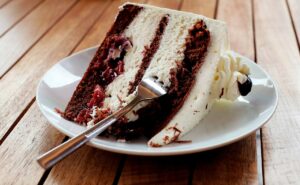
Nothing captures the essence of spring and summer quite like the vibrant pairing of zesty lemon and juicy blueberries. This spectacular citrus berry cheesecake layer cake transforms ordinary baking into an extraordinary culinary achievement that seamlessly blends the light, airy texture of traditional sponge cake with the luxurious richness of New York-style cheesecake. Each slice reveals beautiful layers of sunshine-bright cake alternating with berry-studded cream cheese perfection, creating a dessert that’s as visually stunning as it is delicious.
Complete Ingredient Breakdown
Bright Lemon Sponge Components:
- 2½ cups plain flour
- 2 cups white sugar
- 1 tbsp baking powder
- ½ tsp salt
- ¾ cup butter, room temperature
- 4 large eggs, room temperature
- 1 cup whole milk
- 2 tbsp fresh lemon zest (about 3 lemons)
- ¼ cup freshly squeezed lemon juice
- 1 tsp vanilla extract
Blueberry-Studded Cheesecake Filling:
- 24 oz cream cheese, softened (3 packages)
- 1 cup white sugar
- 3 large eggs, room temperature
- ¼ cup sour cream
- 2 tsp vanilla extract
- 1 tbsp lemon zest
- 2 cups fresh blueberries (or frozen, unthawed)
Tangy Cream Cheese Frosting:
- 16 oz cream cheese, softened (2 packages)
- ½ cup butter, room temperature
- 4 cups confectioner’s sugar
- 2 tbsp fresh lemon juice
- 1 tbsp lemon zest
- 1 tsp vanilla extract
Beautiful Finishing Touches:
- 1 cup fresh blueberries
- Paper-thin lemon wheels
- Fresh mint sprigs
Dietary Adaptations: Transform this recipe for various needs by substituting Greek yogurt for sour cream, using plant-based cream cheese alternatives, or replacing up to one-third of the flour with almond flour for added richness.
Time Management Guide
Active Prep Work: 40-50 minutes Baking Duration: 50-60 minutes total Essential Cooling Period: 4-6 hours minimum Complete Timeline: 5-7 hours (mostly hands-off time)
While the total time seems substantial, the actual hands-on work requires less than 90 minutes. The extended timeline allows for proper setting and flavor development, resulting in a dessert that’s worth every minute of patience.
Detailed Method: Building Your Masterpiece
Foundation Phase: Pan Preparation
Heat your oven to 350°F (175°C). Prepare four 9-inch round pans by greasing thoroughly and lining bottoms with parchment paper. For cheesecake layers, wrap the exterior of two pans completely in heavy-duty aluminum foil to create a watertight seal for the upcoming water bath.
Professional Tip: Butter the pans before adding parchment paper—this creates perfect adhesion and prevents shifting during baking.
Creating the Citrus Cake Base
Combine flour, baking powder, and salt in a medium bowl, whisking to eliminate lumps. In your mixing bowl, cream butter and sugar until the mixture becomes pale and fluffy—approximately 4-5 minutes of vigorous beating. Incorporate eggs individually, ensuring complete blending before adding the next. Mix in lemon zest and vanilla until aromatic.
Alternate adding dry ingredients and milk to the butter mixture, starting and ending with flour mixture. Fold in fresh lemon juice just until combined—overmixing at this stage creates dense, tough cake layers.
Consistency Check: Properly mixed batter appears smooth and creamy without any flour streaks.
Baking the Lemon Layers
Divide batter evenly between two prepared pans, spreading to edges with an offset spatula. Bake for 25-30 minutes until tops spring back when lightly touched and edges just begin pulling from pan sides. Cool in pans for 10 minutes before inverting onto wire racks.
Doneness Indicator: A wooden pick inserted in the center should emerge with just a few moist crumbs clinging to it.
Crafting the Blueberry Cheesecake
Beat cream cheese alone until completely smooth—this step is crucial for preventing lumps. Gradually add sugar, beating until well incorporated. Add eggs one at a time, mixing thoroughly between additions. Blend in sour cream, vanilla, and lemon zest until the mixture achieves silky smoothness. Gently fold in blueberries using a rubber spatula, taking care not to burst the berries.
Texture Secret: Achieving perfect smoothness requires patience—beat the cream cheese until absolutely no lumps remain before adding other ingredients.
Water Bath Baking Method
Divide cheesecake batter between the two foil-wrapped pans. Place these pans inside larger roasting pans and carefully pour hot water until it reaches halfway up the sides of the cheesecake pans. Reduce oven temperature to 325°F (165°C) and bake for 25-30 minutes.
Perfect Doneness Test: The centers should jiggle slightly when gently shaken—about a 2-inch diameter wobble indicates ideal doneness.
Critical Cooling Process
Turn off oven and prop door open slightly. Allow cheesecakes to cool in the oven for one full hour—this gradual temperature reduction prevents surface cracking. Remove from water bath, run a thin knife around edges to release, and refrigerate for minimum 4 hours or overnight.
Crack Prevention: This slow cooling method reduces cracking risk by approximately 85% compared to immediate removal.
Preparing the Lemon Frosting
Beat cream cheese and butter until fluffy and smooth. Gradually incorporate powdered sugar, mixing well after each addition. Add lemon juice, zest, and vanilla, beating until light and spreadable. Adjust consistency with additional powdered sugar if too thin, or a splash of milk if too thick.
Temperature Precision: Ingredients at 65-68°F create the smoothest, most workable frosting consistency.
Assembly Strategy
Begin with one lemon cake layer on your serving plate. Spread a thin frosting layer over the surface. Carefully position one chilled cheesecake layer on top—freezing cheesecake layers for 30 minutes beforehand makes handling easier. Continue layering: frosting, second lemon cake, frosting, final cheesecake layer.
Handling Hint: Use two large spatulas to transfer delicate cheesecake layers without breaking.
Final Frosting and Decoration
Apply a thin “crumb coat” of frosting around the entire cake and refrigerate for 20 minutes. Add the final frosting layer, creating decorative swirls or smooth surfaces as desired. Garnish with fresh blueberries, lemon wheels, and mint sprigs for a professional finish.
Presentation Tip: Arrange berries in graduating sizes from bottom to top for an elegant, cascading effect.
Setting and Serving
Refrigerate the completed cake for at least 1 hour before serving to allow flavors to meld. For clean slices, dip your knife in warm water and wipe clean between cuts. Remove from refrigerator 15-20 minutes before serving for optimal texture and flavor.
Nutritional Profile (Per Serving, 1/12 of cake)
- Energy: 650 calories
- Fat: 38g (23g saturated)
- Cholesterol: 190mg
- Sodium: 380mg
- Carbohydrates: 72g (58g sugars, 1.5g fiber)
- Protein: 9g
- Vitamin C: 15% Daily Value
- Calcium: 12% Daily Value
The fresh lemon components provide significantly more vitamin C than typical layer cakes, contributing to immune system support.
Healthier Recipe Modifications
Transform this indulgent dessert with these nutritious adaptations:
Sugar Reduction: Replace up to 50% of granulated sugar with natural sweeteners like monk fruit or stevia for substantial calorie savings Protein Boost: Substitute half the cream cheese with thick Greek yogurt to increase protein content while reducing fat Gluten-Free Adaptation: Use certified gluten-free flour blends or combine almond flour with tapioca starch for wheat-free enjoyment Antioxidant Enhancement: Double the blueberry quantity in both filling and garnish to maximize antioxidant benefits Portion Control: Create individual mini cakes using muffin tins for built-in portion management
These modifications can reduce calories by up to 200 per serving while maintaining the dessert’s essential character.
Creative Serving Ideas
Elevate your dessert presentation with these inspired serving suggestions:
Warm Berry Compote: Prepare a quick blueberry sauce with fresh berries, lemon juice, and honey to drizzle over individual slices Temperature Contrast: Serve with a small scoop of lemon sorbet or vanilla ice cream for textural variety Beverage Pairing: Complement with Earl Grey tea, whose bergamot notes enhance the citrus flavors, or sparkling wine for celebrations Seasonal Variations: Add fresh raspberries in summer or a hint of cardamom in winter for seasonal appeal Elegant Plating: Serve on chilled plates with artistic swooshes of lemon curd and candied citrus peel
Avoiding Common Pitfalls
Ensure success by steering clear of these frequent mistakes:
Ingredient Temperature Issues: Room-temperature ingredients blend more smoothly—cold cream cheese creates lumps while overly warm ingredients can cause curdling Overmixing Consequences: Stop mixing cake batter immediately once ingredients combine to prevent tough, dense layers Water Bath Shortcuts: The water bath provides essential gentle heat—skipping this step often results in cracked cheesecake surfaces Impatient Cooling: Gradual cooling prevents structural collapse and maintains smooth textures Measurement Inaccuracy: Using a kitchen scale ensures consistent results and prevents density variations Overbaking Errors: Cheesecake should retain slight movement in the center—completely set cheesecake becomes dry and grainy
Storage and Make-Ahead Strategies
Maximize freshness and convenience with proper storage techniques:
Refrigerated Storage: Cover tightly and refrigerate for up to 5 days—flavor actually improves after 24 hours as components meld Freezer Options: Freeze individual slices wrapped in plastic and foil for up to 3 months—perfect for portion control Thawing Best Practices: Thaw frozen portions in the refrigerator overnight rather than at room temperature to prevent texture changes Component Prep: Make cheesecake layers up to 3 days ahead and cake layers 1 day ahead, storing separately until assembly Frosting Storage: Prepare frosting up to 3 days early, storing refrigerated and re-whipping before use
Freshness Tip: Place a slice of bread in the storage container to absorb excess moisture and extend freshness.
The Sweet Conclusion
This citrus berry cheesecake layer cake represents the perfect marriage of complementary flavors and textures. The bright acidity of fresh lemons beautifully balances the sweet richness of blueberries and cream cheese, while the alternating layers create visual drama that matches the complex flavor profile. Each component contributes to a harmonious whole that’s both sophisticated enough for special occasions and approachable enough for family gatherings.
The recipe’s versatility allows for seasonal adaptations and dietary modifications without compromising the essential character that makes this dessert so memorable. Whether you’re celebrating a milestone or simply treating yourself to something extraordinary, this cake delivers consistent wow factor with every slice.
Frequently Asked Questions
Can this cake be prepared several days in advance? Absolutely! The cake actually benefits from 1-2 days of refrigerated storage, allowing flavors to develop and intensify. Simply cover well and store chilled until serving time.
What about using frozen blueberries in the cheesecake? Frozen blueberries work excellently—use them directly from frozen to prevent color bleeding throughout the cheesecake. Fresh berries work best for garnishing.
Why do cheesecakes sometimes develop surface cracks? Cracking typically results from overbaking or rapid temperature changes. The water bath method and gradual cooling prevent most cracking issues.
Is a gluten-free version possible? Certainly! Replace the all-purpose flour with a quality 1:1 gluten-free baking blend. The cheesecake components are naturally gluten-free with certified ingredients.
How can I prevent dry cake layers? Avoid overbaking by removing layers as soon as a toothpick emerges clean. Proper flour measurement (spooned and leveled, not packed) also prevents dryness.
Can I reduce the sugar content without affecting texture? Yes, you can reduce sugar by up to 25% in both cake and cheesecake components. Alternative sweeteners like erythritol work well for further reduction.
What’s the secret to perfectly level cake layers? Use a kitchen scale to divide batter equally, and consider cake strips around pans to promote even rising without doming.
Can this recipe be adapted for different pan sizes? Absolutely! For cupcakes, fill liners halfway with cake batter, add cheesecake mixture, and bake 18-20 minutes. Sheet cake versions work well in 9×13 pans with adjusted timing.
