

Meta Description:
Discover Paula Deen’s famous Corn Casserole recipe! This creamy, buttery side dish with jiffy corn muffin mix is perfect for holidays, potlucks, and family dinners. Easy to make and absolutely delicious!
Meta Keywords:
Paula Deen corn casserole, jiffy corn casserole, creamy corn casserole, easy corn casserole recipe, southern corn casserole, holiday side dish, thanksgiving corn casserole
Introduction
If you’re looking for the perfect comfort food side dish, Paula Deen’s Corn Casserole is an absolute must-try! This Southern classic combines sweet corn, creamy texture, and buttery goodness into one irresistible dish. Often called “Corn Pudding” or “Jiffy Corn Casserole,” this recipe has become a staple at holiday tables across America.
Whether you’re planning your Thanksgiving menu, preparing for a Christmas dinner, or bringing a dish to a potluck, Paula Deen’s Corn Casserole never disappoints. With just a handful of simple ingredients and minimal prep time, you’ll have a crowd-pleasing side dish that pairs perfectly with turkey, ham, roasted chicken, or barbecue.
Why This Recipe Works
Paula Deen’s Corn Casserole has earned its legendary status for several reasons:
- Incredibly Easy: With just 5-6 basic ingredients, even beginner cooks can master this recipe
- Perfectly Balanced: The combination of sweet corn and savory elements creates an addictive flavor
- Creamy Texture: Sour cream and butter create an ultra-moist, pudding-like consistency
- Versatile: Works beautifully for holidays, weeknight dinners, or potlucks
- Make-Ahead Friendly: Can be assembled in advance and baked when needed
- Always a Hit: Both kids and adults love this sweet and savory side dish
Ingredients You’ll Need
Main Ingredients:
- 1 box (8.5 oz) Jiffy Corn Muffin Mix – The secret ingredient that gives this casserole its signature texture
- 1 can (15 oz) whole kernel corn, drained – Adds sweet corn kernels throughout
- 1 can (15 oz) creamed corn – Creates the creamy, pudding-like base
- 1 cup sour cream – Adds tanginess and moisture
- 1/2 cup (1 stick) butter, melted – Essential for that rich, buttery flavor
- 2 large eggs – Helps bind everything together
Optional Add-Ins:
- 1 cup shredded cheddar cheese – For an extra cheesy version
- 4 oz cream cheese, softened – Makes it even creamier
- 1/4 cup diced jalapeños – For a spicy kick
- 1/4 cup chopped green onions – Adds fresh flavor
- 1/2 teaspoon garlic powder – For extra savory depth
Equipment Needed
- 9×13 inch baking dish
- Large mixing bowl
- Whisk or wooden spoon
- Measuring cups and spoons
- Non-stick cooking spray
Step-by-Step Instructions
Step 1: Preheat and Prepare
Preheat your oven to 350°F (175°C). Grease a 9×13 inch baking dish with butter or non-stick cooking spray.
Step 2: Mix the Wet Ingredients
In a large mixing bowl, combine the sour cream, melted butter, and eggs. Whisk together until smooth and well combined.
Step 3: Add the Corn
Stir in the whole kernel corn (drained) and creamed corn. Mix until everything is evenly distributed.
Step 4: Add the Jiffy Mix
Gently fold in the Jiffy Corn Muffin Mix until just combined. Be careful not to overmix – a few lumps are perfectly fine. Overmixing can make the casserole tough.
Step 5: Add Cheese (Optional)
If you’re making the cheesy version, fold in 1 cup of shredded cheddar cheese, reserving some for topping if desired.
Step 6: Pour and Smooth
Pour the mixture into your prepared baking dish. Use a spatula to smooth the top evenly.
Step 7: Bake
Bake in the preheated oven for 45-55 minutes, or until the casserole is golden brown on top and set in the center. A toothpick inserted in the middle should come out mostly clean with just a few moist crumbs.
Step 8: Rest and Serve
Let the casserole rest for 5-10 minutes before serving. This allows it to set up and makes serving easier.
Recipe Tips and Tricks
For the Best Results:
- Don’t Skip the Sour Cream: This is what makes Paula Deen’s version extra moist and tangy
- Use Real Butter: Margarine won’t give you the same rich flavor
- Let It Set: The casserole continues to firm up as it cools slightly
- Check for Doneness: The center should be set but still slightly jiggly – it will firm up as it cools
- Room Temperature Ingredients: Let cold ingredients sit out for 15-20 minutes before mixing
Common Mistakes to Avoid:
- Overbaking: This can dry out your casserole
- Overmixing: Mix just until combined to keep it tender
- Skipping the Drain: Always drain the whole kernel corn to avoid a watery casserole
- Wrong Pan Size: Using a different size pan will affect cooking time
Variations and Substitutions
Spicy Southwestern Corn Casserole:
- Add 1 can diced green chiles
- Mix in 1/4 cup pickled jalapeños
- Top with pepper jack cheese
- Garnish with fresh cilantro
Extra Cheesy Version:
- Add 1 cup cheddar cheese to the batter
- Mix in 4 oz softened cream cheese
- Top with 1/2 cup more cheese before baking
- Add 1/4 cup grated Parmesan
Healthier Option:
- Use light sour cream or Greek yogurt
- Reduce butter to 1/4 cup
- Use reduced-fat cheese
- Add 1/2 cup diced bell peppers for extra veggies
Bacon Lover’s Version:
- Fold in 6-8 strips of cooked, crumbled bacon
- Top with more bacon before serving
- Add 1/4 cup chopped green onions
Make-Ahead Instructions
Paula Deen’s Corn Casserole is perfect for preparing in advance:
To Make Ahead:
- Assemble the casserole completely
- Cover tightly with plastic wrap and refrigerate
- Store for up to 24 hours before baking
- Remove from fridge 30 minutes before baking
- Bake as directed, adding 5-10 minutes if needed
Freezing Instructions:
- Assemble in a freezer-safe dish
- Cover with plastic wrap, then aluminum foil
- Freeze for up to 3 months
- Thaw overnight in refrigerator
- Bake as directed
Storage and Reheating
Storage:
- Store leftover corn casserole in an airtight container in the refrigerator
- Keeps well for 3-4 days
- Cool completely before covering to prevent condensation
Reheating:
- Oven Method: Cover with foil and reheat at 350°F for 15-20 minutes
- Microwave Method: Heat individual portions for 1-2 minutes
- Air Fryer: Reheat at 350°F for 5-7 minutes for a crispy top
What to Serve with Corn Casserole
This versatile side dish pairs beautifully with:
Holiday Mains:
- Roasted turkey
- Honey-glazed ham
- Prime rib
- Roasted chicken
BBQ Favorites:
- Pulled pork
- Smoked brisket
- BBQ ribs
- Grilled chicken
Other Great Sides:
- Green bean casserole
- Mashed potatoes
- Sweet potato casserole
- Cranberry sauce
- Stuffing
- Mac and cheese
Frequently Asked Questions
Can I use frozen corn instead of canned?
Yes! Use 2 cups of thawed frozen corn in place of the canned whole kernel corn. The creamed corn is still essential for proper texture.
Why is my corn casserole watery?
Make sure to drain the whole kernel corn thoroughly. Also, avoid overmixing, which can break down the structure.
Can I use a different corn muffin mix?
Jiffy is preferred for its specific texture and sweetness, but other 8-9 oz corn muffin mixes can work. Results may vary slightly.
Is corn casserole the same as corn pudding?
They’re very similar! Corn casserole typically uses a corn muffin mix for structure, while corn pudding is more custard-like.
How do I know when it’s done?
The casserole should be golden brown on top, set in the center, and a toothpick inserted should come out with just moist crumbs.
Can I make this gluten-free?
Yes! Use a gluten-free corn muffin mix. Make sure all other ingredients are certified gluten-free.
Why did my casserole sink in the middle?
This can happen if the oven temperature is too low, it wasn’t baked long enough, or the oven door was opened too early during baking.
Nutritional Information (Per Serving)
Based on 12 servings:
- Calories: 240
- Total Fat: 13g
- Saturated Fat: 7g
- Cholesterol: 60mg
- Sodium: 380mg
- Total Carbohydrates: 27g
- Dietary Fiber: 2g
- Sugars: 8g
- Protein: 4g
Note: Nutritional values are approximate and may vary based on specific ingredients used.
The Complete Recipe Card
Paula Deen’s Corn Casserole
Prep Time: 10 minutes
Cook Time: 50 minutes
Total Time: 1 hour
Servings: 12
Difficulty: Easy
Ingredients:
- 1 box (8.5 oz) Jiffy Corn Muffin Mix
- 1 can (15 oz) whole kernel corn, drained
- 1 can (15 oz) creamed corn
- 1 cup sour cream
- 1/2 cup (1 stick) butter, melted
- 2 large eggs
- 1 cup shredded cheddar cheese (optional)
Instructions:
- Preheat oven to 350°F. Grease a 9×13 inch baking dish.
- In a large bowl, whisk together sour cream, melted butter, and eggs.
- Stir in whole kernel corn and creamed corn.
- Gently fold in Jiffy mix until just combined.
- Add cheese if using.
- Pour into prepared dish and smooth the top.
- Bake 45-55 minutes until golden and set.
- Let rest 5-10 minutes before serving.
Final Thoughts
Paula Deen’s Corn Casserole is more than just a recipe – it’s a tradition that brings families together. This simple yet incredibly delicious side dish has earned its place on countless holiday tables for good reason. The combination of sweet corn, creamy texture, and buttery richness creates a comfort food masterpiece that everyone loves.
Whether you’re making it for Thanksgiving, Christmas, Easter, or just a regular family dinner, this corn casserole is guaranteed to be a hit. The best part? It’s so easy that you can whip it up in just 10 minutes of prep time!
Don’t be surprised when guests ask for the recipe – this is one of those dishes that people remember long after the meal is over. Make it once, and it might just become your new go-to side dish for every special occasion.
Hashtags for Social Sharing:
#PaulaDeenRecipes #CornCasserole #JiffyCornCasserole #ThanksgivingSides #HolidayRecipes #ComfortFood #SouthernRecipes #EasySideDish #CasseroleRecipes #HolidayCooking #ThanksgivingFood #ChristmasDinner #PotluckRecipes #FamilyDinner #SideDishRecipes #CornPudding #SouthernCooking #HomeCooking #RecipeIdeas #FoodBlogger
Pin This Recipe!
Alt Text for Pinterest: Creamy Paula Deen corn casserole in white baking dish with golden brown top, showing moist, pudding-like texture with visible corn kernels
Save this recipe to your Pinterest boards for easy access during the holidays! This corn casserole is perfect for Thanksgiving, Christmas, potlucks, and family gatherings.
Did you make this recipe? Leave a comment below and let us know how it turned out! We’d love to hear about any variations you tried.
Honey Glazed Carrots & Green Beans: A Perfect Sweet and Savory Side Dish
Meta Description:
Learn how to make perfectly glazed Honey Carrots & Green Beans! This easy, healthy side dish recipe features tender-crisp vegetables coated in a sweet honey butter glaze. Perfect for holidays, weeknight dinners, and special occasions!
Meta Keywords:
honey glazed carrots, honey green beans, glazed vegetables, healthy side dish, easy vegetable recipe, holiday side dish, honey butter vegetables, roasted carrots and green beans
Introduction
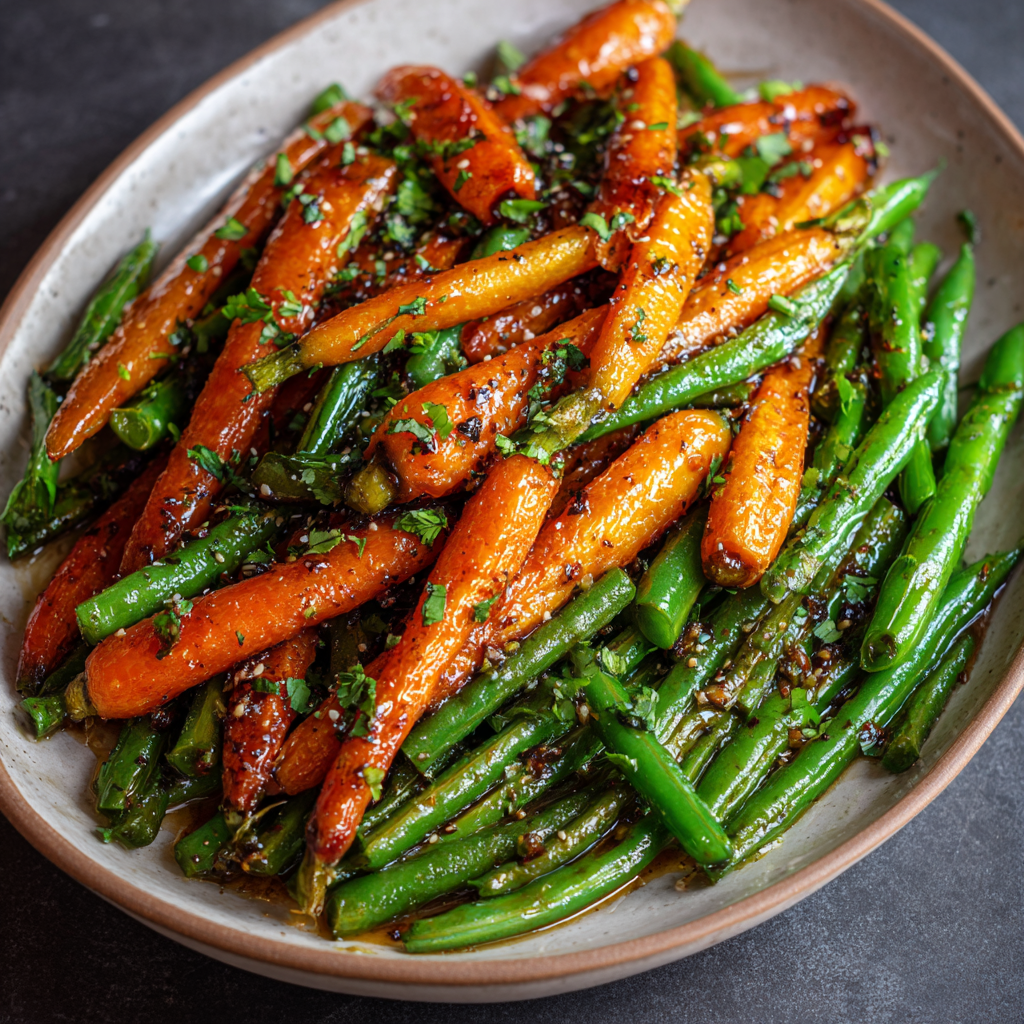
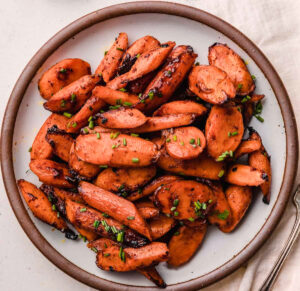
Honey Glazed Carrots & Green Beans is the ultimate side dish that transforms simple vegetables into something spectacular! This colorful, nutritious recipe combines the natural sweetness of carrots with the fresh crunch of green beans, all coated in a luxurious honey butter glaze that will have everyone asking for seconds.
Whether you’re planning a holiday feast, preparing a weeknight family dinner, or looking for a healthy yet delicious side dish, this recipe checks all the boxes. The beautiful presentation with vibrant orange and green colors makes it as appealing to the eyes as it is to the palate. Best of all, it comes together in just 20 minutes!
This versatile dish pairs beautifully with everything from roasted chicken and grilled steak to holiday turkey and baked ham. Once you master this simple technique, it’ll become your go-to vegetable side dish for any occasion.
Why You’ll Love This Recipe
Honey Glazed Carrots & Green Beans offers numerous benefits that make it a kitchen staple:
- Quick & Easy: Ready in just 20 minutes from start to finish
- Healthy & Nutritious: Packed with vitamins, fiber, and antioxidants
- Naturally Sweet: Honey provides sweetness without refined sugar
- Beautiful Presentation: Vibrant colors make any plate look gourmet
- Versatile: Works for casual dinners or elegant holiday meals
- Kid-Friendly: The sweet glaze helps picky eaters enjoy their vegetables
- Budget-Friendly: Uses affordable, everyday ingredients
- Customizable: Easy to adapt with different herbs and seasonings
- Make-Ahead Friendly: Can be partially prepped in advance
Ingredients You’ll Need
Main Ingredients:
- 1 lb carrots – Peeled and cut into sticks or coins (about 4-5 medium carrots)
- 1 lb fresh green beans – Trimmed and cleaned
- 3 tablespoons butter – Unsalted preferred for better control of saltiness
- 3 tablespoons honey – Pure honey works best for authentic flavor
- 2 cloves garlic, minced – Fresh garlic adds amazing depth
- 1/2 teaspoon salt – Adjust to taste
- 1/4 teaspoon black pepper – Freshly ground for best flavor
- 1/4 teaspoon dried thyme – Or 1 teaspoon fresh thyme
Optional Enhancements:
- 1 tablespoon lemon juice – Brightens the flavors
- 1/4 teaspoon red pepper flakes – For a subtle kick
- 2 tablespoons chopped fresh parsley – For garnish and freshness
- 1/4 cup toasted pecans or almonds – Adds crunch
- 1 tablespoon balsamic vinegar – Adds tangy complexity
- 1/2 teaspoon ginger, grated – For Asian-inspired variation
- Zest of 1 orange – Citrus twist
Equipment Needed
- Large skillet or sauté pan (12-inch recommended)
- Medium pot for blanching
- Colander or strainer
- Sharp knife and cutting board
- Measuring spoons
- Wooden spoon or spatula
- Bowl of ice water (for blanching method)
Step-by-Step Instructions
Step 1: Prepare the Vegetables
Wash and peel the carrots, then cut them into uniform sticks or coins about 1/4-inch thick. This ensures even cooking. Trim the ends off the green beans and cut any extra-long beans in half for uniform size.
Step 2: Blanch the Vegetables (Optional but Recommended)
Bring a large pot of salted water to a boil. Add the carrots first and cook for 3-4 minutes. Add the green beans and cook together for another 2-3 minutes until tender-crisp. Drain and immediately plunge into ice water to stop the cooking process. This preserves the vibrant colors and ensures perfect texture.
Alternative: You can skip blanching and cook everything in the skillet, but it will take longer.
Step 3: Make the Honey Glaze
In a large skillet over medium heat, melt the butter. Add the minced garlic and sauté for 30 seconds until fragrant but not browned. Stir in the honey, salt, pepper, and thyme. Let the mixture bubble gently for about 1 minute to combine flavors.
Step 4: Add the Vegetables
If you blanched the vegetables, pat them dry with paper towels before adding to the skillet. Add the carrots and green beans to the honey butter glaze. Toss to coat evenly.
Step 5: Glaze and Cook
Cook over medium-high heat, stirring frequently, for 5-7 minutes. The glaze should coat the vegetables beautifully and become slightly sticky. The vegetables should be tender but still have a slight crunch.
Step 6: Final Touches
Taste and adjust seasoning with more salt and pepper if needed. If desired, add a squeeze of lemon juice for brightness or a sprinkle of fresh herbs.
Step 7: Serve
Transfer to a serving dish immediately while hot. Garnish with fresh parsley or toasted nuts if using. Serve warm for the best flavor and texture.
Cooking Methods Comparison
Stovetop Method (Recommended):
- Time: 15-20 minutes
- Best for: Quick weeknight dinners
- Texture: Tender-crisp with glossy glaze
- Control: Easy to monitor doneness
Oven-Roasted Method:
- Preheat oven to 400°F
- Toss vegetables with melted butter, honey, and seasonings
- Spread on a baking sheet in single layer
- Roast for 20-25 minutes, stirring halfway
- Best for: Hands-off cooking and slightly caramelized edges
Instant Pot Method:
- Use steamer basket with 1 cup water
- Steam on high pressure for 2 minutes
- Quick release, then toss with honey glaze
- Best for: When you need the stovetop for other dishes
Air Fryer Method:
- Toss vegetables with honey mixture
- Air fry at 380°F for 12-15 minutes, shaking basket halfway
- Best for: Crispy texture with less butter
Recipe Variations
Asian-Inspired Honey Glazed Vegetables:
- Replace butter with sesame oil
- Add 1 tablespoon soy sauce
- Mix in 1 teaspoon grated ginger
- Garnish with sesame seeds and green onions
- Add a splash of rice vinegar
Maple Glazed Version:
- Substitute honey with pure maple syrup
- Add 1/4 teaspoon cinnamon
- Top with toasted pecans
- Perfect for fall dinners
Balsamic Honey Glaze:
- Add 2 tablespoons balsamic vinegar
- Include 1 teaspoon Dijon mustard
- Sprinkle with crumbled goat cheese before serving
- Garnish with fresh basil
Spicy Honey Glazed Vegetables:
- Add 1/4 teaspoon cayenne pepper
- Mix in 1 teaspoon sriracha
- Top with crushed red pepper flakes
- Finish with lime juice
Herb Garden Version:
- Use mixture of fresh herbs (rosemary, thyme, parsley)
- Add 1 tablespoon fresh lemon zest
- Finish with 1/4 cup toasted pine nuts
- Drizzle with extra virgin olive oil
Orange Honey Glaze:
- Add juice and zest of 1 orange
- Include 1/4 teaspoon ground ginger
- Garnish with orange segments
- Perfect for holiday meals
Make-Ahead Instructions
Advance Prep (Up to 24 Hours):
- Wash, peel, and cut vegetables
- Store in airtight containers in refrigerator
- Prep garlic and measure out ingredients
- Blanch vegetables if desired, store refrigerated
Day-Of Assembly:
- Remove vegetables from fridge 15 minutes before cooking
- Make fresh glaze and cook vegetables as directed
- Total active time: 10-15 minutes
Reheating Instructions:
- Stovetop: Best method – reheat in skillet with a splash of water
- Microwave: Heat in 30-second intervals, stirring between
- Oven: Reheat at 350°F for 10 minutes covered
Note: While you can make this ahead, vegetables taste best when freshly glazed.
Storage Tips
Refrigerator Storage:
- Store in an airtight container
- Keeps well for 3-4 days
- Store glaze separately if possible for best texture
- Cool completely before refrigerating
Freezing (Not Recommended):
- Green beans and glazed carrots don’t freeze well
- The texture becomes mushy upon thawing
- The glaze separates and becomes watery
- Best enjoyed fresh
Meal Prep Tips:
- Cut vegetables on Sunday for easy weeknight cooking
- Make double batches – leftovers reheat reasonably well
- Keep raw vegetables prepped in water to maintain freshness
- Store honey glaze ingredients pre-measured in small containers
Perfect Pairings
Main Dishes:
- Roasted Chicken: Classic combination
- Grilled Steak: Perfect steakhouse-style side
- Baked Salmon: Light and elegant pairing
- Pork Chops: Sweet glaze complements pork beautifully
- Turkey: Essential holiday side dish
- Glazed Ham: Sweet flavors work in harmony
- Meatloaf: Comfort food perfection
- Lamb Chops: Sophisticated dinner option
Complementary Sides:
- Garlic mashed potatoes
- Wild rice pilaf
- Buttered dinner rolls
- Caesar salad
- Roasted sweet potatoes
- Creamy polenta
- Quinoa salad
Holiday Menu Ideas:
Thanksgiving: Pair with turkey, stuffing, and cranberry sauce Christmas: Serve alongside prime rib and Yorkshire pudding Easter: Perfect with honey-glazed ham and scalloped potatoes
Nutritional Information
Per serving (based on 6 servings):
- Calories: 120
- Total Fat: 6g
- Saturated Fat: 4g
- Cholesterol: 15mg
- Sodium: 220mg
- Total Carbohydrates: 17g
- Dietary Fiber: 4g
- Sugars: 11g
- Protein: 2g
- Vitamin A: 180% DV
- Vitamin C: 25% DV
- Iron: 6% DV
- Calcium: 4% DV
Health Benefits:
- Carrots: Rich in beta-carotene, supports eye health
- Green Beans: High in vitamin K, aids bone health
- Honey: Natural antioxidants and antibacterial properties
- Garlic: Immune-boosting compounds
- Low Calorie: Nutrient-dense without excessive calories
Tips for Perfect Results
Achieving Perfect Texture:
- Don’t Overcook: Vegetables should be tender-crisp, not mushy
- Cut Uniformly: Ensures even cooking throughout
- Use High Heat: Helps glaze caramelize without overcooking vegetables
- Don’t Crowd the Pan: Cook in batches if necessary
- Dry Vegetables Well: Excess water dilutes the glaze
Glaze Perfection:
- Watch the Heat: Too high and honey burns, too low and it doesn’t caramelize
- Stir Frequently: Prevents sticking and ensures even coating
- Add Glaze in Stages: Reserve some to add at the end for extra shine
- Use Quality Honey: Better flavor makes a noticeable difference
- Balance Sweet and Savory: Adjust honey and salt to taste
Presentation Tips:
- Arrange Artfully: Alternate colors on the serving platter
- Garnish Generously: Fresh herbs add visual appeal
- Serve Immediately: Glaze looks best when fresh and glossy
- Use White Dishes: Makes colors pop beautifully
- Add Texture: Toasted nuts or seeds add visual interest
Frequently Asked Questions
Can I use frozen vegetables instead of fresh?
Yes, but fresh vegetables provide the best texture and flavor. If using frozen, thaw and pat completely dry before cooking. Reduce cooking time by 2-3 minutes.
Why are my vegetables soggy?
This usually happens from: (1) Not drying vegetables after blanching, (2) Overcrowding the pan, or (3) Cooking over too-low heat. Use high heat and give vegetables space.
Can I substitute the honey?
Maple syrup works wonderfully. Agave nectar is also an option, though it’s less flavorful. Brown sugar can work but dissolve it in a little water first.
How do I prevent the garlic from burning?
Add garlic after butter melts, cook only 30 seconds, then add honey immediately. The honey helps protect garlic from burning.
Can I make this dairy-free?
Absolutely! Replace butter with olive oil or coconut oil. Both work well, though coconut oil adds a subtle tropical note.
What if I don’t have fresh green beans?
Snap peas, asparagus, or broccoli florets work beautifully with the same preparation method. Adjust cooking times as needed.
How do I know when vegetables are done?
Pierce with a fork – there should be slight resistance. They should bend but not break. Taste test is always best!
Can I add other vegetables?
Yes! Bell peppers, snap peas, asparagus, or Brussels sprouts work well. Just adjust cooking times based on vegetable density.
Troubleshooting Common Issues
Problem: Glaze is too thin
Solution: Cook over higher heat to reduce and thicken. Add another tablespoon of honey and cook until glossy.
Problem: Glaze is too thick or sticky
Solution: Add 1-2 tablespoons of water or vegetable broth to thin it out.
Problem: Vegetables are undercooked
Solution: Cover pan for 2-3 minutes to steam. Or blanch vegetables longer initially.
Problem: Honey is crystallizing
Solution: Lower heat immediately. Add splash of water and stir until smooth.
Problem: Garlic tastes bitter
Solution: Garlic burned – cook it for less time next attempt, only until fragrant.
Problem: Colors look dull
Solution: Blanch vegetables in boiling water, then shock in ice bath before glazing.
The Complete Recipe Card
Honey Glazed Carrots & Green Beans
Prep Time: 10 minutes
Cook Time: 10-15 minutes
Total Time: 20-25 minutes
Servings: 6
Difficulty: Easy
Course: Side Dish
Cuisine: American
Ingredients:
- 1 lb carrots, peeled and cut into sticks
- 1 lb fresh green beans, trimmed
- 3 tablespoons butter
- 3 tablespoons honey
- 2 cloves garlic, minced
- 1/2 teaspoon salt
- 1/4 teaspoon black pepper
- 1/4 teaspoon dried thyme
- 2 tablespoons fresh parsley, chopped (optional)
Instructions:
- Prepare vegetables: Cut carrots into uniform sticks. Trim green beans.
- Blanch (optional): Boil carrots for 3-4 minutes, add green beans for 2-3 more minutes. Drain and shock in ice water. Pat dry.
- Make glaze: Melt butter in large skillet over medium heat. Add garlic, cook 30 seconds. Stir in honey, salt, pepper, and thyme.
- Cook vegetables: Add carrots and green beans to skillet. Toss to coat in glaze.
- Finish: Cook 5-7 minutes over medium-high heat, stirring frequently, until vegetables are tender-crisp and beautifully glazed.
- Serve: Transfer to serving dish. Garnish with fresh parsley if desired. Serve immediately.
Recipe Notes:
- For deeper caramelization, roast at 400°F for 20-25 minutes
- Double the recipe easily for large gatherings
- Best served fresh but reheats reasonably well
- Adjust honey to taste – start with 2 tablespoons if you prefer less sweet
Expert Chef Tips
Professional Techniques:
- Blanching is Key: Restaurant-quality vegetables always start with proper blanching
- Mise en Place: Have everything prepped before starting – cooking goes quickly
- Glaze Consistency: Should coat the back of a spoon without being syrupy
- Temperature Control: Medium-high heat creates the perfect glaze without burning
- Fresh Finish: Add fresh herbs at the very end to preserve their bright flavor
Time-Saving Hacks:
- Buy pre-cut vegetables from the produce section
- Use pre-minced garlic from a jar in a pinch
- Make glaze mixture ahead and refrigerate
- Steam vegetables in microwave for 4-5 minutes instead of blanching
- Use one large pan to cook everything together
Seasonal Variations
Spring Version:
- Add fresh asparagus and snap peas
- Use fresh mint instead of thyme
- Finish with lemon zest
- Garnish with edible flowers
Summer Version:
- Include yellow squash or zucchini
- Add fresh basil and oregano
- Mix in cherry tomatoes at the end
- Finish with white balsamic glaze
Fall Version:
- Substitute maple syrup for honey
- Add roasted butternut squash
- Include fresh sage
- Top with toasted pecans
Winter Version:
- Add roasted root vegetables (parsnips, turnips)
- Use rosemary and thyme
- Include dried cranberries
- Finish with orange zest
Kid-Friendly Tips
Making Vegetables Appealing to Children:
- Let them help: Kids who cook are more likely to eat
- Cut fun shapes: Use small cookie cutters on carrot coins
- Call it “candy vegetables”: The honey glaze makes them sweet
- Serve with dip: Ranch or honey mustard on the side
- Make it a game: “Eat the rainbow” with colorful vegetables
- Start small: Just 2-3 pieces to try
- Praise attempts: Positive reinforcement works wonders
- Be patient: May take 10-15 exposures before acceptance
Budget-Friendly Tips
Saving Money:
- Buy carrots in bulk bags instead of pre-cut baby carrots
- Purchase green beans when in season for best prices
- Use frozen vegetables when fresh are expensive
- Buy honey in large containers – much more economical
- Grow your own herbs in windowsill pots
- Check farmer’s markets for better vegetable prices
- Stock up during sales and freeze extras
Cost Per Serving: Approximately $1.50-$2.00
Final Thoughts
Honey Glazed Carrots & Green Beans is proof that simple ingredients can create something truly special. This recipe transforms everyday vegetables into a side dish worthy of your holiday table or a special dinner, yet it’s easy enough for busy weeknight meals.
The natural sweetness of honey combined with the rich butter creates an irresistible glaze that enhances rather than masks the fresh flavors of the vegetables. The vibrant colors bring life to any plate, making even the simplest meal feel more special.
Whether you’re trying to get your family to eat more vegetables, looking for a reliable side dish for entertaining, or simply want to elevate your everyday cooking, this recipe delivers every time. The best part? It’s so versatile that you’ll never get bored – experiment with different vegetables, herbs, and flavor additions to make it your own.
Once you master this technique, you’ll find yourself using it for all sorts of vegetables. It’s become a staple in kitchens everywhere for good reason – it’s foolproof, delicious, and always a crowd-pleaser.
Related posts:
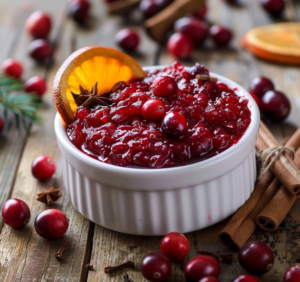 Homemade Cranberry Sauce Recipe: The Perfect Holiday Side Dish
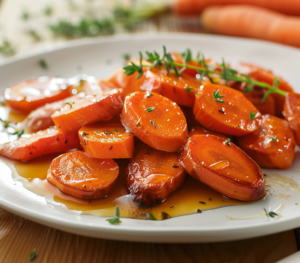 Glazed Carrots Recipe: The Perfect Sweet And Savory Side Dish
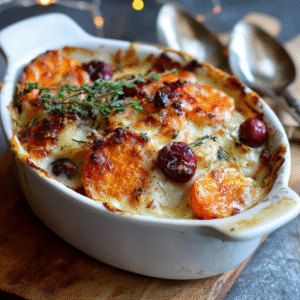 Sweet Potato & Cranberry Gratin: An Elegant Holiday Side Dish
 Learn How To Cook Fresh Green Beans, Southern Style! Your Family Will Love These… | Southern Green Bean Recipes, Thanksgiving Recipes Side Dishes, Green Bean Recipes
 Honey Garlic Butter Roasted Carrots: The Perfect Side Dish You Need To Try Today
 Honey Garlic Lemon Pepper Chicken Thighs: A Perfect Blend Of Sweet, Tangy And Savory