


Revolutionizing Your Side Dish Game
Picture this: tender potato chunks with golden, craggy surfaces that crackle with each bite, all nestled in a perfectly balanced creamy dressing. This isn’t your grandmother’s potato salad – it’s a modern masterpiece that combines rustic charm with sophisticated technique.
The magic happens when we abandon the traditional boil-and-cube method in favor of a brilliant two-step process: gentle cooking followed by strategic smashing and high-heat roasting. This approach creates a textural symphony that elevates the humble potato into something truly extraordinary.
What makes this technique so special? It’s all about contrast. The crushing process exposes maximum surface area to intense oven heat, creating countless crispy edges while preserving creamy centers. Every irregular surface becomes a flavor trap, capturing and concentrating the creamy dressing in ways that smooth, cubed potatoes simply can’t match.
Selecting Your Potato Arsenal
The Perfect Candidates
Small, round potatoes are your best allies for this technique. Fingerling varieties shine here, offering naturally buttery flavors and sturdy structures that withstand the smashing process beautifully. Baby red potatoes and petite Yukon varieties work equally well, each bringing their own unique characteristics to the final dish.
Size consistency matters more than perfection – aim for potatoes roughly the same diameter to ensure even cooking. Avoid russets or other high-starch varieties, as they tend to fall apart during the crushing phase.
Quality Indicators
Look for firm potatoes with smooth, unblemished skins. Avoid any with green tinges, soft spots, or extensive sprouting. The skins will become part of the final dish, so choose potatoes you’d be happy eating skin and all.
Building Your Flavor Foundation
Core Components
Your ingredient list should start with 2½ pounds of small potatoes – this slightly larger quantity accounts for the dramatic texture transformation that makes each potato more substantial and satisfying.
For the roasting phase, choose between extra-virgin olive oil for herbaceous notes or unsalted butter for rich, nutty flavors. You’ll need about ¼ cup of whichever fat you select, plus coarse kosher salt and freshly ground pepper.
The Dressing Symphony
Creating the perfect dressing requires balancing richness with brightness. Start with ¾ cup of full-fat mayonnaise – this isn’t the time for light versions, as the fat content helps the dressing cling to those irregular surfaces.
White wine vinegar provides clean acidity, while whole-grain mustard adds both tang and textural interest. A touch of maple syrup or agave balances the acidity without overpowering the savory elements.
Fresh elements make all the difference: minced shallots for subtle onion flavor, fresh herbs like tarragon or chervil for sophistication, and a generous amount of chopped chives for color and mild onion notes.
The Technique: Step by Step
Initial Cooking Phase
Begin by giving your potatoes a thorough scrub under cool running water. Leave the skins on – they’ll contribute both flavor and visual appeal to the finished dish.
Place clean potatoes in your largest pot and cover with cold water by 3 inches. Add 2 tablespoons of salt to the water – this isn’t just for flavor, it’s for proper seasoning throughout the potato flesh.
Bring the water to a vigorous boil, then reduce to a steady simmer. Cook for 12-18 minutes, testing for doneness with a sharp knife. The potatoes should yield easily to pressure but still hold their shape when lifted.
The Critical Cooling Period
Drain the potatoes immediately and spread them on a clean kitchen towel. This cooling and drying phase is crucial – excess moisture is the enemy of crispiness. Allow 15-20 minutes for proper cooling and surface drying.
During this time, position your oven rack in the upper third and preheat to 450°F. Line your largest rimmed baking sheet with parchment paper, leaving room for generous spacing between potatoes.
The Smashing Transformation
Transfer cooled potatoes to your prepared baking sheet, leaving at least 2 inches between each one. Using a wide, flat-bottomed tool – a potato masher, measuring cup bottom, or even a clean can – press down firmly but gently on each potato.
The goal is to create flat, irregular discs about ¾-inch thick with plenty of craggy edges and exposed surfaces. Don’t worry about uniformity – the more varied the shapes, the more interesting the final texture.
Achieving Golden Perfection
Brush or drizzle your chosen fat generously over each smashed potato, making sure to coat all the exposed surfaces and crevices. Season boldly with salt and pepper – the increased surface area can handle more seasoning than you might expect.
Roast for 20-25 minutes without moving them, allowing the bottom surfaces to develop deep golden color. Carefully flip each potato and continue roasting for another 10-15 minutes until both sides are crispy and golden.
The finished potatoes should sound slightly hollow when tapped and have deeply caramelized edges throughout.
Crafting the Ultimate Dressing
Building Layers of Flavor
In a spacious mixing bowl, whisk together your mayonnaise, vinegar, mustard, and sweetener until completely smooth. The consistency should coat a spoon but remain easily pourable.
Add your aromatics – minced shallots, garlic, and herbs – along with salt and white pepper to taste. White pepper provides heat without the visual specks of black pepper, maintaining a cleaner appearance.
The Resting Ritual
Allow this dressing to rest at room temperature for at least 45 minutes before using. This resting period allows the raw shallot and garlic flavors to mellow while the herbs release their essential oils into the creamy base.
Taste and adjust just before mixing – you may find you want additional acidity or a touch more sweetness depending on your other ingredients.
Assembly and Finishing Touches
The Crucial Timing
Temperature matters significantly when combining components. Your roasted potatoes should be warm but not steaming hot – about 10-15 minutes of cooling time is perfect. This warmth helps the potatoes absorb dressing flavors while preventing the mayonnaise from breaking.
Gentle Integration
Add the warm potatoes to your prepared dressing and fold together using a large spoon or rubber spatula. Use a gentle lifting and folding motion rather than stirring, which can break those precious crispy edges.
If including additional elements like chopped eggs, celery, or fresh herbs, fold them in at this stage. Each addition should complement rather than compete with the starring crispy potatoes.
Final Seasoning
Taste the assembled salad and adjust seasoning as needed. The warm potatoes may require additional salt, and the overall dish might benefit from a squeeze of fresh lemon juice or an extra pinch of herbs.
Creative Adaptations
International Inspirations
Transform this base technique with global flavors. A German-inspired version might include crispy bacon, caraway seeds, and a vinegar-forward dressing. For Mediterranean flair, add sun-dried tomatoes, pine nuts, and fresh basil with a lemon-olive oil dressing.
Seasonal Variations
Spring versions can incorporate fresh peas, asparagus tips, and delicate herbs like dill or chervil. Summer iterations might feature sweet corn, cherry tomatoes, and fresh basil. Fall adaptations could include roasted Brussels sprouts leaves or toasted pumpkin seeds.
Dietary Modifications
Create dairy-free versions using high-quality vegan mayonnaise and nutritional yeast for umami depth. For lower-fat options, replace half the mayonnaise with Greek yogurt, though this will change the flavor profile significantly.
Service and Storage Strategies
Optimal Serving Conditions
This salad shines at multiple temperatures. Serve it warm for the most dramatic textural contrast, at room temperature for balanced flavors, or chilled for traditional potato salad familiarity with bonus crunch.
Make-Ahead Considerations
For best results when preparing in advance, store the crispy potatoes and dressing separately until just before serving. The potatoes can be roasted up to 4 hours ahead and kept at room temperature, while the dressing improves with overnight refrigeration.
Presentation Ideas
Serve family-style in a large, shallow bowl that showcases the rustic beauty of the irregular potato shapes. For elegant occasions, plate individual portions on small plates, garnishing with microgreens or edible flowers.
Troubleshooting Common Issues
Preventing Sogginess
If your potatoes lose their crispiness after dressing, the likely culprits are excess moisture or over-hot potatoes when dressing was added. Always ensure potatoes are properly dried after initial cooking and adequately cooled before dressing.
Achieving Proper Browning
Uneven browning usually results from overcrowding on the baking sheet or insufficient fat coating. Use multiple pans if necessary and don’t be stingy with oil or butter.
Flavor Balance Problems
If the finished salad tastes flat, it likely needs more acid (vinegar or lemon juice) or salt. If it’s too rich, additional fresh herbs or a splash of pickle juice can brighten the overall flavor profile.
The Final Word
This crispy smashed potato salad represents the perfect marriage of technique and creativity. By understanding the fundamental principles – proper cooking, effective smashing, high-heat roasting, and careful assembly – you create a foundation for endless experimentation.
The beauty lies not just in the final dish, but in the process itself. There’s something deeply satisfying about transforming simple ingredients through thoughtful technique into something remarkable. Each batch teaches you more about heat control, seasoning balance, and the importance of timing.
Whether served alongside grilled meats at a summer gathering or featured as the centerpiece of a vegetarian feast, this dish delivers both comfort and sophistication. It’s approachable enough for weeknight dinners yet impressive enough for special occasions.
Most importantly, this technique opens doors to countless variations and adaptations. Master the basic method, then let your creativity guide you toward flavor combinations that reflect your personal taste and seasonal ingredient availability. The crispy, golden foundation you’ve learned to create will support whatever culinary adventures you choose to pursue.
Related posts:
 Delicious Sunshine Salad: Fresh Ingredients For A Healthy Meal
 Crispy Parmesan Chicken With A Rich Garlic Sauce
 Delicious Rosemary Roasted Potato Peelings Recipe
 French Onion Potato Bake: A Delicious Comfort Food Fusion
 Delicious Croissant Chicken Caesar Salad Sandwich Recipe
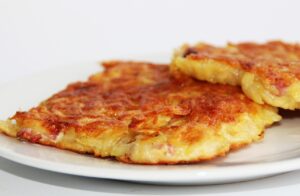 Potato Pancakes (Reibekuchen) Recipe: Authentic German Comfort Food At Home