

Warning: This recipe may cause spontaneous kitchen dancing and uncontrollable urges to open your own bakery.
Ever wondered why some pastries cost $8 at fancy cafés? You’re about to discover their secrets – and then laugh all the way to your own kitchen. This chocolate cream cheese Danish recipe doesn’t just teach you to bake; it transforms you into the neighborhood pastry legend.
The Science Behind the Magic
Danish pastry isn’t just rolled dough with filling thrown on top. It’s an engineering marvel disguised as breakfast. The laminated dough technique creates hundreds of microscopic butter pockets that explode into steam during baking, literally puffing your pastry into golden perfection.
Think of it as edible origami meets chemistry class – except way more delicious and significantly less likely to explode (unless you count flavor explosions).
Ingredients That Actually Matter
Skip the grocery store basics. These ingredients make the difference between “meh” and “Oh my God, did you really make this?!”
The Dough Dream Team:
- 3 cups high-quality all-purpose flour (King Arthur recommended)
- 3 tbsp superfine sugar (caster sugar dissolves better)
- 1 envelope instant yeast (no waiting around)
- 1¼ tsp sea salt (enhances every other flavor)
- ⅔ cup whole milk (warmed to baby bath temperature)
- 3 large eggs (room temperature is non-negotiable)
- 10 tbsp European butter (higher fat content = flakier layers)
The Chocolate Cream Dream:
- 10 oz cream cheese (full-fat only – this isn’t diet food)
- ⅔ cup powdered sugar (sifted, because lumps are the enemy)
- ⅓ cup premium cocoa powder (Valrhona if you’re feeling fancy)
- 3 oz dark chocolate (72% cacao, melted and cooled)
- 2 egg yolks (save the whites for breakfast tomorrow)
- 2 tsp Madagascar vanilla (the good stuff matters here)
- 3 tbsp sour cream (secret tanginess booster)
- ⅓ cup mini chocolate chunks (irregular shapes distribute better)
The No-Stress Method That Actually Works
Phase 1: Building Your Base
Forget everything you’ve heard about complicated yeast procedures. Whisk your dry ingredients in a large bowl, then create a crater in the center like a flour volcano. Pour in your warm milk and beaten eggs, then use a fork to gradually pull flour from the edges into the liquid center.
This creates a shaggy, slightly sticky mass that looks nothing like the Instagram photos – and that’s perfect. Dump this mess onto your counter and knead gently for exactly 90 seconds. Yes, we’re timing this. Over-kneading equals tough Danish, and nobody wants that tragedy.
Wrap your dough baby in plastic and let it nap in the fridge for minimum 6 hours. Overnight is even better. This isn’t just resting – it’s flavor development and gluten relaxation therapy.
Phase 2: The Butter Block Ballet
Take your cold butter and place it between two sheets of parchment. Now comes the fun part: grab your rolling pin and gently persuade (read: whack) the butter into a 7×5 inch rectangle. The butter should bend without breaking – think flexible, not hard or melty.
Roll your chilled dough into a 14×10 inch rectangle. Place your butter block dead center, then fold the dough over it like tucking a baby into bed. Seal those edges like your pastry’s life depends on it.
Phase 3: The Lamination Meditation
Here’s where patience pays off. Roll your butter-dough package into an 18×8 inch rectangle, working gently but purposefully. Fold it into thirds like a business letter, brush off excess flour, then wrap and chill for 1 hour.
Repeat this exact process two more times. Each fold multiplies your butter layers exponentially. By the third fold, you’ve created 81 distinct layers. That’s not cooking – that’s architecture.
Phase 4: Filling Perfection
While your dough completes its final meditation session, create filling magic. Beat room-temperature cream cheese until it’s completely smooth – no shortcuts here. Any lumps will mock you in the final product.
Sift your powdered sugar and cocoa together (seriously, sift it), then slowly incorporate into your cream cheese paradise. Add your cooled melted chocolate in a thin stream while beating – this prevents chocolate seizure, which sounds medical but is actually a pastry disaster.
Fold in egg yolks, vanilla, and sour cream until smooth as silk pajamas. Finally, hand-fold those chocolate chunks with a rubber spatula. Aggressive mixing breaks the chunks, and we want textural surprises in every bite.
Assembly: Where Art Meets Appetite
Roll your final dough to ¼-inch thickness – no thicker or you’ll have doughy centers, no thinner or the filling will break through. Cut into 4-inch squares using a sharp knife or pizza cutter. Dull tools tear the dough and ruin your beautiful layers.
Place exactly 2½ tablespoons of filling in each square’s center. Here’s the secret: leave a ¾-inch border all around. Too much filling equals messy disasters that look like pastry crime scenes.
For shaping, try the “envelope fold”: bring two opposite corners to the center and pinch firmly. Leave the other corners open to showcase that gorgeous filling. This creates rustic elegance that screams “I’m a pastry artist” without requiring actual artistic skills.
Baking Like a Boss
Position racks in your oven’s upper and lower thirds, then preheat to 365°F. Yes, that’s oddly specific, but trust the process. Most ovens run hot, and delicate cream cheese filling doesn’t appreciate aggressive heat.
Brush each Danish with egg wash made from 1 whole egg plus 2 tablespoons heavy cream. This creates a glossy, professional finish that makes people assume you went to culinary school.
Bake 19-23 minutes, swapping pan positions halfway through. Your Danish are done when they’re deep golden brown and the filling jiggles slightly but doesn’t slosh around like liquid.
Cool on wire racks for exactly 15 minutes before serving. Any sooner and you’ll burn your tongue on molten chocolate; any longer and they lose that perfect warm-pastry magic.
When Things Go Sideways (And How to Fix Them)
Butter melting everywhere? Your kitchen’s too warm. Chill everything and work faster next time.
Filling leaking out? You overfilled or didn’t seal properly. Less filling, better sealing, problem solved.
Dense, tough pastries? You overworked the dough or skipped chilling steps. Danish dough is delicate – treat it like the temperamental artist it is.
Pale, sad-looking results? Your oven temperature was too low or you underbaked. Danish should be confident golden brown, not timid beige.
Level-Up Variations for the Adventurous
Once you’ve mastered the basics, try these flavor bombs:
Orange Chocolate: Add orange zest to the filling and brush finished pastries with orange simple syrup.
Salted Caramel Twist: Drizzle cooled Danish with homemade salted caramel sauce.
Espresso Kick: Add 1 tablespoon instant espresso to the chocolate filling for mocha magic.
Berry Bomb: Press fresh raspberries into the filling before baking for tart contrast.
Storage Secrets That Actually Work
These beauties peak within 4 hours of baking but remain incredible for 2 days at room temperature, covered loosely. For longer storage, wrap individually and freeze up to 3 months.
Reheating frozen Danish: 325°F oven for 8-10 minutes brings them back to near-fresh perfection. Microwaving turns them into sad, soggy disappointments – don’t do it.
The Real Talk About Timing
Total active time: about 45 minutes spread over 2 days. Most of the process involves waiting while dough chills and butter does its lamination magic. Plan ahead, and you’ll have warm pastries without the morning stress.
Start the dough the night before you want to serve them. Shape and fill the next morning, then bake fresh for maximum impact.
Why This Recipe Changes Everything
Learning Danish pastry technique opens doors to countless other pastries: croissants, pain au chocolat, palmiers, and more. You’re not just making breakfast – you’re mastering fundamental pastry skills that impress even professional bakers.
More importantly, you’re creating moments. That first bite of flaky pastry giving way to rich chocolate cream cheese filling? That’s not just food – that’s edible happiness served on a plate.
So grab your apron, clear your schedule, and prepare to become the person everyone asks to bring dessert. Your Danish-making journey starts now, and trust me, there’s no going back to store-bought after this.
Related posts:
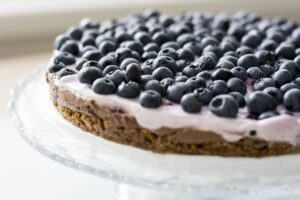 Blueberry Cottage Cheese Breakfast Bake Recipe
 Cherry Chocolate Cookies: Mastering The Ultimate Flavor Fusion
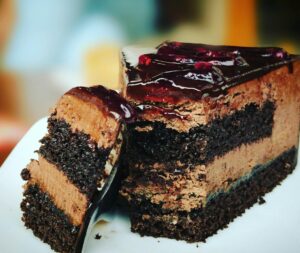 Decadent Chocolate Cherry Upside Down Cake: A Perfect Blend Of Rich And Fruity Flavors
 Cinnamon Sugar Cruffins: The Ultimate Pastry Hybrid Recipe
 Vanilla Buttermilk Pound Cake With Cream
 Smothered Chicken With Cheese And Sour Cream