

Meta Description: Learn how to make the best dill pickles at home! This easy recipe gives you crunchy, flavorful pickles perfect for snacking, canning, or meals.
Introduction
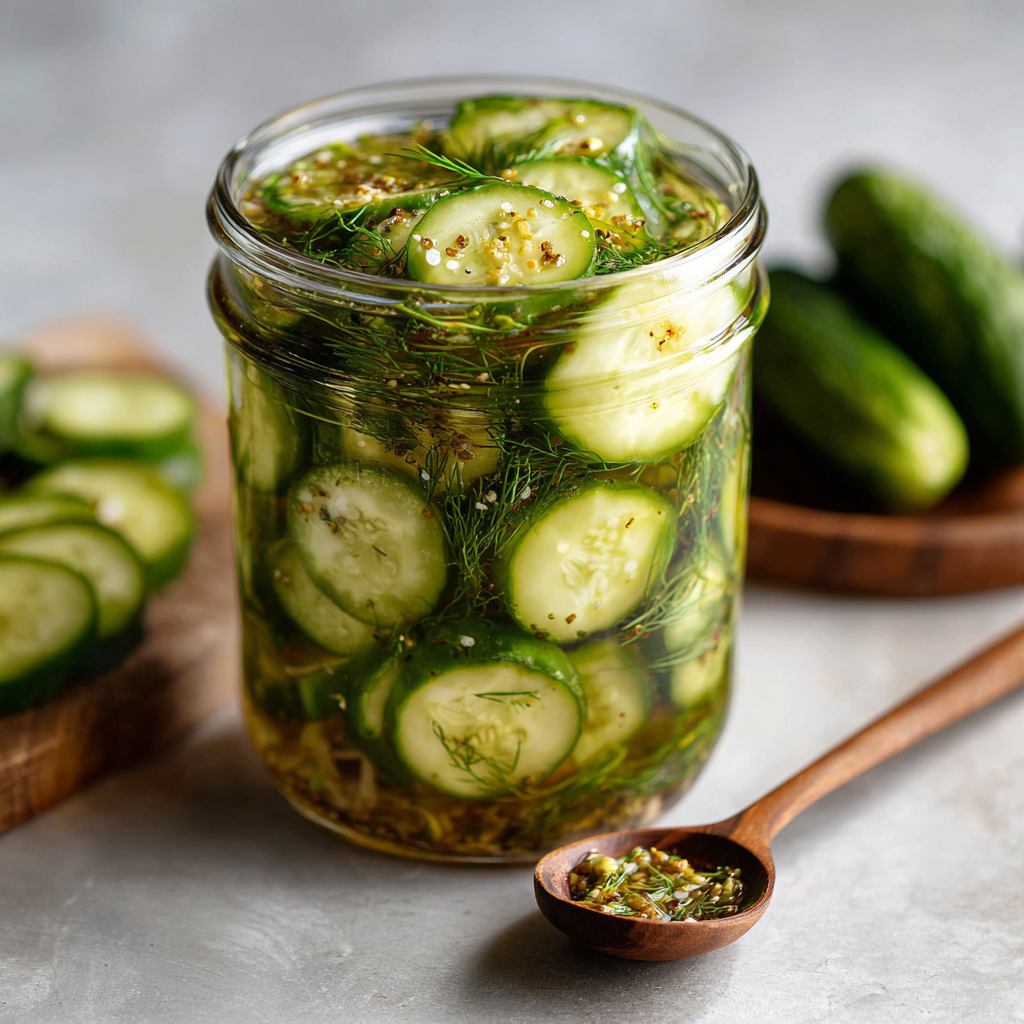
Love that perfect crunch in a dill pickle? This dill pickle recipe will show you how to make your own flavorful pickles at home in just a few simple steps. There’s nothing quite like the satisfaction of biting into a homemade pickle that you’ve crafted from scratch – the tangy brine, the fresh dill aroma, and that irresistible crunch that store-bought varieties often lack.
Making homemade dill pickles isn’t just about saving money (though you definitely will!). It’s about taking control of your ingredients, avoiding unnecessary preservatives, and creating pickles that are perfectly tailored to your taste preferences. Whether you’re looking for a quick dill pickles solution for tonight’s dinner or planning to preserve cucumbers for the entire year, this comprehensive guide has you covered. You’ll discover the secrets to achieving that perfect balance of tangy, garlicky, and herbaceous flavors that make dill pickles absolutely addictive.
Why You’ll Love This Dill Pickle Recipe
This easy dill pickle recipe stands out from the countless variations online for several compelling reasons. First, it’s incredibly versatile – you can adapt it for quick refrigerator pickles when you need them fast, or use it as a dill pickle canning recipe for long-term storage. The ingredient list is simple and affordable, using items you likely already have in your pantry.
What makes this the best dill pickle recipe is the perfect balance of flavors and textures. The brine creates pickles that are tangy without being overpowering, with just enough salt to enhance the cucumber’s natural flavor. The fresh dill and garlic add layers of complexity that transform ordinary cucumbers into gourmet pickles that rival any artisanal brand.
The recipe is also incredibly forgiving for beginners. Unlike some preservation methods that require precise timing and temperatures, this approach allows for some flexibility while still delivering consistently excellent results. Whether you’re new to pickling or a seasoned home preserver, you’ll find this method both approachable and reliable.
Ingredients You’ll Need
For the Pickles:
- 2-3 pounds fresh cucumbers (pickling cucumbers work best, but regular cucumbers are fine)
- 4-6 fresh dill heads or 4 tablespoons dried dill
- 6-8 garlic cloves, peeled and slightly crushed
- 2 cups white vinegar (5% acidity)
- 2 cups water
- 3 tablespoons pickling salt (or kosher salt)
- 1 tablespoon sugar (optional, for balanced flavor)
Optional Flavor Enhancers:
- 1 teaspoon black peppercorns
- 1/2 teaspoon red pepper flakes (for heat)
- 1 teaspoon mustard seeds
- 2-3 bay leaves
- Grape leaves or horseradish leaves (for extra crunch)
SEO Tip: This dill pickle brine recipe forms the foundation for perfect garlic dill pickles homemade recipe results every time. The proportions create the ideal balance of acidity and flavor that makes these pickles irresistible.
Step-by-Step Instructions
Step 1 – Prepare Cucumbers
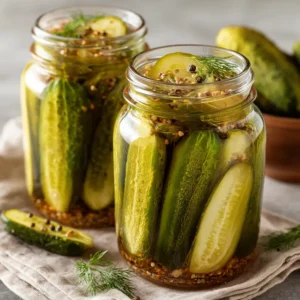
Start by selecting the freshest cucumbers possible – they should be firm, bright green, and free from soft spots. Wash them thoroughly under cold running water, scrubbing gently to remove any dirt or residue. For this dill pickle spears recipe, you can cut cucumbers lengthwise into quarters for classic spear shapes, slice them into rounds for chips, or leave smaller cucumbers whole for traditional whole pickles.
If you’re using larger cucumbers, remove the blossom end (the end opposite the stem) as it contains enzymes that can make pickles soft. For the crunchiest results, soak your prepared cucumbers in ice water for 1-2 hours before pickling. This extra step helps firm up the cucumber flesh and contributes to that perfect crunch we’re after.
Step 2 – Make the Brine
In a large saucepan, combine the water, vinegar, pickling salt, and sugar (if using). This dill pickle recipe with vinegar creates the perfect acidic environment for safe preservation and optimal flavor development. Bring the mixture to a rolling boil, stirring until the salt completely dissolves.
The key to a great brine is achieving the right balance of acidity and salinity. The 1:1 ratio of water to vinegar creates pickles that are tangy but not harsh, while the salt not only flavors but also helps draw moisture from the cucumbers, creating that characteristic pickle texture.
Step 3 – Pack the Jars
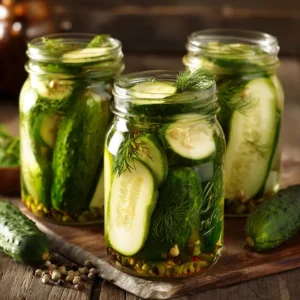
Using clean mason jars (sterilized if you plan to can them), create your flavor layers. Start by placing 1-2 dill heads (or 1 tablespoon dried dill) in the bottom of each jar, along with 2-3 garlic cloves and your choice of optional spices. Pack the cucumber pieces tightly but not so tight that they’re compressed – you want the brine to flow freely around them.
Add another layer of dill on top of the cucumbers, then carefully pour the hot brine over everything, leaving about 1/2 inch of headspace at the top of each jar. Use a clean knife or chopstick to gently remove any air bubbles by sliding it down the sides of the jar.
Step 4 – Seal & Chill
For refrigerator dill pickles easy recipe results, simply place tight-fitting lids on the jars and refrigerate immediately. Your pickles will be ready to eat in 24-48 hours, though they’ll continue to develop flavor over the first week.
If you’re following this as a canning recipe for long-term storage, process the sealed jars in a boiling water bath for 10 minutes (adjust for altitude as needed). This old fashioned dill pickle recipe method ensures your pickles will stay fresh and safe for up to one year when stored in a cool, dark place.
Tips for Crunchy Dill Pickles
Achieving that perfect crunch is often the difference between good pickles and great ones. Here are the professional secrets that make this crunchy dill pickles recipe consistently successful:
Choose the right cucumbers: Small, firm pickling cucumbers (3-4 inches long) work best, but if you can only find larger cucumbers, choose ones that feel heavy for their size and have minimal seeds. The skin should be unwaxed and have a slightly bumpy texture.
Temperature matters: Use cucumbers at room temperature when packing jars, but chill them beforehand in ice water. This temperature contrast helps maintain cell structure during the pickling process.
Add natural crisping agents: Grape leaves contain natural tannins that help maintain crunch. If you don’t have access to grape leaves, a small piece of horseradish leaf or even a pinch of calcium chloride (pickle crisp) works well.
Don’t skip the waiting period: While it’s tempting to taste your pickles immediately, allowing them to cure for at least 24 hours lets the flavors develop and the texture to properly set.
Variations to Try
Spicy Dill Pickles
Transform this base recipe by adding 1-2 sliced jalapeños per jar and increasing the red pepper flakes to 1 teaspoon per jar. For serious heat lovers, try adding a few drops of hot sauce to the brine or include fresh serrano peppers.
Kosher Dill Pickles
Create authentic kosher-style pickles by doubling the garlic (4-6 cloves per jar), adding 1 teaspoon of coriander seeds per jar, and including extra fresh dill. The increased aromatics create the complex flavor profile associated with traditional Jewish delicatessen pickles.
Sweet & Dill Mix
For those who enjoy a more balanced flavor profile, increase the sugar to 1/4 cup in the brine recipe. This creates pickles with tangy-sweet notes that pair beautifully with sandwiches and burgers while maintaining that classic dill character.
Serving Suggestions
These versatile homemade dill pickles enhance countless dishes beyond the classic sandwich accompaniment. Chop them finely for an amazing potato salad ingredient – the acidity brightens heavy mayonnaise-based salads while adding textural interest. They’re also fantastic diced in tuna or chicken salad, providing both flavor and crunch.
For entertaining, serve pickle spears alongside a charcuterie board – they cleanse the palate between rich cheeses and meats. Try wrapping pickle spears in cream cheese and deli meat for an easy appetizer, or dice them into your favorite deviled egg recipe for added zing.
Don’t overlook using the pickle brine itself – it makes an excellent addition to Bloody Marys, can be used to brine chicken before frying, or even consumed as a post-workout electrolyte drink.
Storage & Shelf Life
Refrigerator pickles made with this quick dill pickles method will maintain peak quality for 4-6 weeks when stored in the refrigerator at 40°F or below. The pickles will continue to develop flavor over time, reaching their optimal taste after about one week.
Properly canned pickles using the water bath processing method will last up to one year in a cool, dark pantry. Always check canned goods before eating – lids should remain concave and sealed, with no signs of rust, bulging, or unusual odors when opened.
For the best flavor and texture, consume opened jars within 2-3 weeks and always use clean utensils when removing pickles to prevent contamination.
FAQ Section
How long do homemade dill pickles last? Refrigerator pickles last 4-6 weeks, while properly canned pickles can last up to one year. Always check for signs of spoilage before consuming, including off odors, unusual colors, or soft textures.
Can I use apple cider vinegar instead of white vinegar? Yes, but it will change the flavor profile and color of your pickles. Apple cider vinegar creates a slightly sweeter, more complex flavor and will give pickles a golden color instead of the classic bright green.
What’s the difference between kosher and dill pickles? Kosher pickles are made in the traditional Jewish style with extra garlic and often include additional spices like coriander. The term “kosher” refers to the style rather than religious dietary compliance, though they can be made to kosher standards.
Why are my pickles soft, not crunchy? Soft pickles usually result from overripe cucumbers, too high processing temperature, or too long processing time. Using calcium chloride, grape leaves, or ensuring your cucumbers are very fresh helps maintain crunch.
Conclusion
This dill pickle recipe truly delivers everything a pickle lover could want – incredible crunch, perfect flavor balance, and the satisfaction of creating something delicious from simple, wholesome ingredients. Whether you choose the quick refrigerator method or decide to can batches for year-round enjoyment, you now have all the knowledge needed to create homemade dill pickles that rival any store-bought variety.
The beauty of this recipe lies in its adaptability. Start with the basic version to master the technique, then experiment with the variations to discover your personal favorite flavor combinations. Remember, the best pickles are the ones made with love and patience – so take your time, follow the steps carefully, and enjoy the incredible results.
Try this recipe today and share your favorite variations in the comments! Your fellow pickle enthusiasts would love to hear about your creative twists and successful batches. Happy pickling!
Pinterest & Social Sharing Section
Save this recipe on Pinterest for later!
Create eye-catching vertical pin images with overlay text featuring “Easy Dill Pickle Recipe” and “Homemade Crunchy Pickles” to maximize social sharing potential. Include step-by-step photos showing the jar packing process and the final beautiful pickle jars for the most engaging visual content.
Share your pickle success stories on social media using hashtags like #HomemadeDillPickles #PickleRecipe #FoodPreservation #CrunchyPickles to connect with the growing community of home food preservers and pickle enthusiasts!
Related posts:
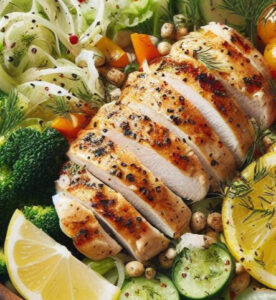 Easy Lemon-Dill Chicken Bowl For A Quick & Healthy Dinner
 Mouthwatering Juicy Baked Meatballs In Homemade Marinara Sauce Recipe
 The Ultimate Guide To Homemade Japanese Katsu Perfection
 How To Make A Homemade Honey Bun Cake: The Ultimate Guide
 How To Make A Big Mac Wrap: Quick & Delicious Homemade Recipe
 Homemade Gluten Free Enchilada Sauce: A Complete Guide