
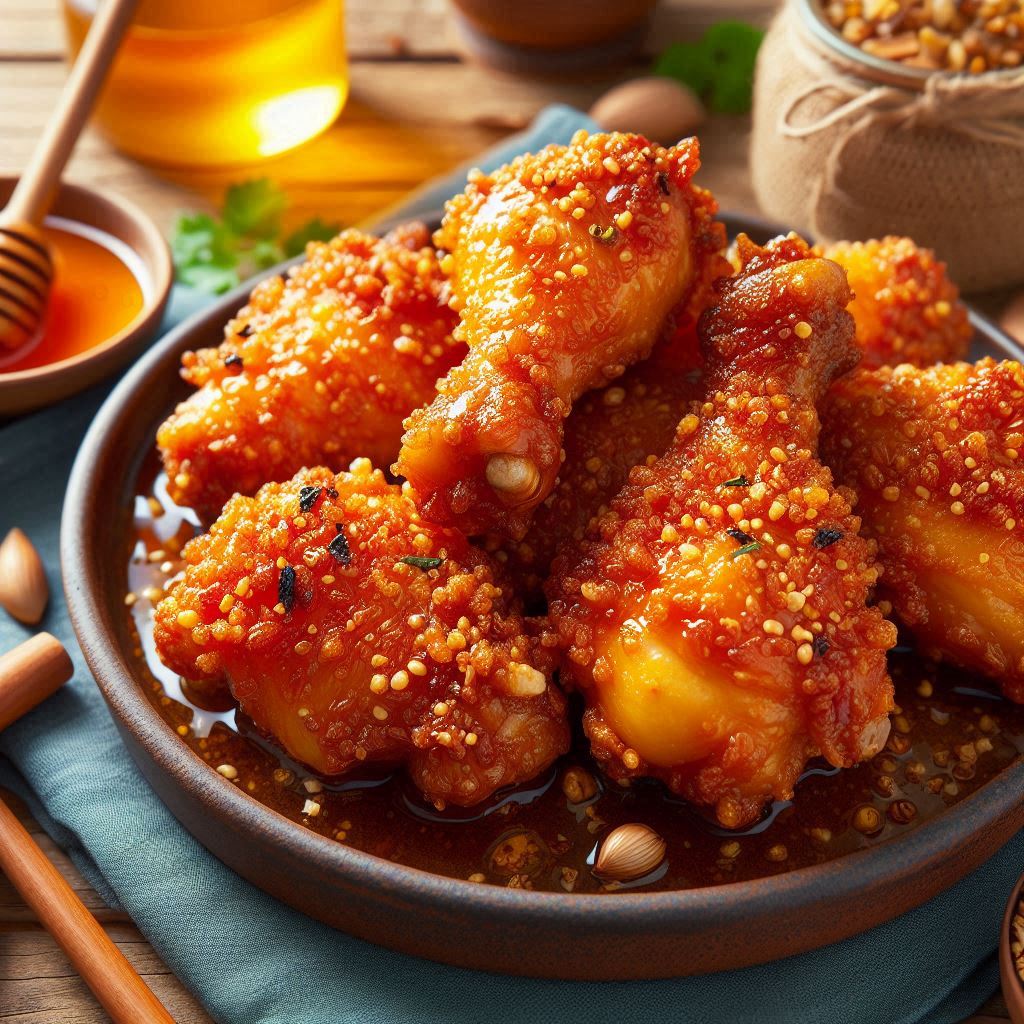

The Ultimate Crispy Baked Hot Honey Chicken Recipe
Transform Your Kitchen Into a Gourmet Experience
Have you ever wondered why your homemade baked chicken never quite matches the crispy perfection of your favorite restaurant? The answer lies in mastering the art of temperature control and coating technique. This revolutionary hot honey chicken recipe eliminates the guesswork, delivering that coveted restaurant-quality crunch without the mess and excess oil of deep frying.
What makes this recipe truly special is the harmonious marriage of sweet honey and fiery spice, creating a flavor profile that’s both comforting and exciting. The result? Chicken that’s impossibly crispy on the outside, succulent on the inside, and glazed with a sauce that’s pure liquid gold.
Essential Ingredients
For the Chicken Base:
- 2 lbs mixed chicken pieces (your choice of cuts)
- 1 cup buttermilk (the secret to tender meat)
- 2 large eggs, beaten
- 2 cups panko breadcrumbs (key to superior crunch)
- 1 cup all-purpose flour
- 2 tsp garlic powder
- 2 tsp smoked paprika
- 1 tsp onion powder
- 1 tsp kosher salt
- ½ tsp freshly ground black pepper
- ¼ tsp cayenne pepper (customize to taste)
- Cooking spray for golden perfection
For the Signature Hot Honey Glaze:
- ½ cup pure honey
- 2-3 tbsp your favorite hot sauce
- 2 tbsp unsalted butter
- 1 tbsp apple cider vinegar
- ¼ tsp sea salt
- 1 fresh garlic clove, finely minced
Smart Ingredient Swaps:
- No buttermilk? Mix 1 cup milk with 1 tbsp white vinegar
- Going gluten-free? Substitute with certified GF flour and breadcrumbs
- Vegan twist? Try agave syrup with a hint of liquid smoke
- Watching sodium? Use herb blends instead of additional salt
Time Investment & Planning
- Prep Work: 20 minutes
- Marination: 30 minutes minimum (overnight is ideal)
- Baking Duration: 35-40 minutes
- Total Investment: About 90 minutes (mostly hands-off time)
The beauty of this method is the minimal active cooking time, giving you freedom to prepare complementary dishes or simply relax while the oven works its magic.
Master Chef Technique Guide
Phase 1: Chicken Preparation
Submerge your chicken pieces completely in buttermilk within a large mixing bowl. The natural acids work to break down tough fibers while creating the perfect foundation for coating adhesion. Allow this magical transformation to occur for at least 30 minutes, though overnight marination yields restaurant-quality results.
Phase 2: Oven Setup
Heat your oven to 425°F and prepare your secret weapon: a wire cooling rack positioned over a parchment-lined baking sheet. This elevation method ensures 360-degree heat circulation, eliminating the need to flip pieces mid-cooking.
Phase 3: Assembly Line Setup
Create your three-station coating system:
- Station 1: Seasoned flour mixture in a shallow dish
- Station 2: Beaten eggs in a wide bowl
- Station 3: Combined flour, panko, and all seasonings
Professional tip: Add a tablespoon of cornstarch to your final coating mixture for extra-crispy results that rival commercial kitchens.
Phase 4: The Coating Process
Remove each piece from the buttermilk bath, allowing excess to drip away. Execute the triple-coating technique: flour dredge, egg wash, then the seasoned panko mixture. Press gently but firmly to ensure maximum adhesion. Arrange on your prepared rack with space between pieces.
Phase 5: Achieving Golden Perfection
Mist the coated chicken with cooking spray before sliding into your preheated oven. Bake for 35-40 minutes for larger pieces or 25-30 minutes for wings, until the internal temperature hits 165°F and the exterior achieves a gorgeous golden-brown hue.
Phase 6: Crafting the Hot Honey Sauce
While your chicken transforms in the oven, combine all sauce ingredients in a small saucepan. Simmer over medium-low heat, stirring occasionally until the mixture thickens enough to coat a spoon while remaining gloriously pourable.
Phase 7: The Final Glaze
Once your chicken reaches perfection, brush each piece generously with the warm honey sauce. For an extra layer of caramelization, return to the oven for 5 additional minutes, creating that irresistible sticky-sweet finish.
Phase 8: The Patience Payoff
Rest your masterpiece for 5 minutes before serving. This crucial step allows juices to redistribute and the glaze to set, ensuring every bite delivers maximum flavor and texture.
Nutritional Breakdown
Per generous serving (recipe serves 4):
- Calories: 485
- Protein: 32g (muscle-building power)
- Carbohydrates: 46g
- Fiber: 2g
- Sugars: 18g (natural honey sweetness)
- Total Fat: 22g
- Saturated Fat: 7g
- Cholesterol: 185mg
- Sodium: 820mg
- Essential Vitamins & Minerals: Rich in Vitamin A, Iron, and Potassium
This baked method reduces fat content by nearly half compared to traditional fried versions while maintaining all the satisfaction and flavor you crave.
Healthier Recipe Modifications
Keto-Friendly Version
Replace breadcrumbs with crushed pork rinds or almond flour for a low-carb option that doesn’t sacrifice crunch.
Sugar-Conscious Alternative
Reduce honey by half and supplement with natural sweeteners like monk fruit to maintain the sweet balance.
Nutrient Boost
Incorporate ground flaxseed or chia seeds into your coating for added omega-3 fatty acids and fiber.
Air Fryer Adaptation
Cook at 375°F for 15-18 minutes, reducing oil usage even further while maintaining crispy perfection.
Plant-Based Version
Substitute cauliflower florets or firm tofu, adjusting cooking time as needed for a vegetarian masterpiece.
Perfect Pairing Suggestions
Comfort Food Classic
Serve alongside creamy garlic mashed potatoes and honey-glazed carrots for the ultimate comfort meal.
Fresh & Light
Create a vibrant salad base with mixed greens, cherry tomatoes, and avocado, topped with sliced hot honey chicken.
Modern Bowl Style
Build a nourishing grain bowl with quinoa, roasted seasonal vegetables, and an extra drizzle of that addictive honey sauce.
Game Day Favorite
Transform into party-perfect wings served with crisp celery, carrot sticks, and cooling ranch dip.
Brunch Innovation
Pair with fluffy waffles and fresh berries for a sweet-savory brunch that will become legendary among your friends.
Avoiding Common Pitfalls
The Soggy Bottom Disaster
Never skip the wire rack setup. Direct contact with the baking sheet creates steam, destroying your crispy dreams.
Overcrowding Mistake
Maintain at least one inch between pieces. Proper spacing improves crispiness dramatically and ensures even cooking.
Coating Catastrophe
Press your coating mixture firmly but gently. Proper adhesion prevents the heartbreak of coating separation during baking.
Temperature Troubles
Resist opening the oven door repeatedly. Each peek can drop internal temperature significantly, extending cooking time and reducing crispiness.
Timing Errors
Apply the honey glaze only after the chicken is fully cooked. Early application leads to soggy coating and bitter flavors.
Storage & Meal Prep Solutions
Refrigeration Strategy
Store leftovers in airtight containers for up to 3 days, using parchment paper between layers to prevent sticking.
Reheating Excellence
Restore crispiness by reheating in a 350°F oven for 10-15 minutes. Finish under the broiler for 2 minutes to revive the glaze.
Make-Ahead Magic
Coat chicken pieces up to 24 hours in advance and refrigerate. This not only saves time but allows flavors to develop more deeply.
Freezer-Friendly Option
Freeze cooked pieces individually before transferring to freezer bags. Store for up to 2 months and reheat directly from frozen.
Sauce Storage
Extra hot honey sauce keeps in the refrigerator for 2 weeks and makes an excellent glaze for vegetables or dipping sauce for sweet potato fries.
Final Thoughts
This crispy baked hot honey chicken recipe proves that you don’t need a deep fryer to achieve restaurant-quality results. The combination of smart technique, quality ingredients, and perfect timing creates a dish that’s both impressive enough for entertaining and simple enough for weeknight dinners.
The sweet heat of the honey glaze paired with the satisfying crunch of the perfectly seasoned coating creates a flavor experience that will have everyone asking for your secret. Best of all, you can feel good about serving a healthier version that doesn’t compromise on taste or texture.
Frequently Asked Questions
Q: Can I use only chicken breasts for this recipe? A: Certainly! Boneless breasts cook faster (25-30 minutes), so monitor the internal temperature carefully to prevent overcooking.
Q: How can I adjust the spice level? A: This recipe offers moderate heat. Reduce hot sauce to 1 tablespoon for mild heat, or add cayenne to the sauce for extra fire.
Q: Is this recipe gluten-free friendly? A: Absolutely! Simply swap regular flour and panko for certified gluten-free alternatives. The texture remains excellent.
Q: What prevents the coating from falling off? A: Success depends on three factors: proper buttermilk marination, correct dredging sequence, and allowing coated chicken to rest before baking.
Q: Can I prepare this for entertaining? A: Yes! Complete the baking up to 2 hours ahead and keep warm at 200°F. Apply the glaze just before serving for optimal results.
Q: How do I know when it’s perfectly cooked? A: Use a digital thermometer inserted into the thickest part of the meat. Chicken is perfectly done at 165°F internal temperature.
Related posts:
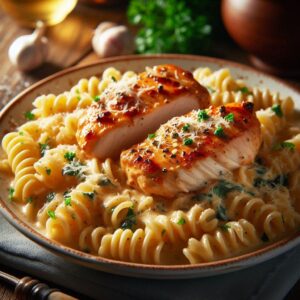
 Creamy Baked Chicken Alfredo Casserole – A Family Favorite
 Lemon Butter Baked Cod: A Foolproof Recipe For Perfect Fish Every Time
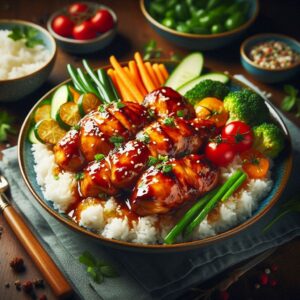 One-Pan Honey BBQ Chicken Rice: Mastering The Chick-fil-A Honey Roasted BBQ Sauce At Home
 How To Make Butter Garlic Parmesan Chicken Wings: The Ultimate Crowd-Pleasing Recipe
 Cheesy Garlic Chicken Wraps: A 30-Minute Meal That Will Transform Your Weeknight Dinner Routine
 Smothered Cheesy Sour Cream Chicken – Creamy Baked Chicken Recipe